With portraiture, what you see is not always what you want to get. Even the very best portrait with the perfect model will often need some form of post-production to get it to pop. Today we are going to look at six classic post production techniques to get the most out of your portraits. These techniques are generally similar in Lightroom and Photoshop but in this article we shall concentrate on Lightroom. When using Photoshop it is best to use an adjustment layer or a duplicate layer to preserve the original.
1. Blemish Removal
No skin is flawless and so to clean up a model’s skin we can use the Spot Edit tool from Lightroom’s develop module. Select the Heal tab not the clone and set a brush size about 50% bigger than the larger blemishes. Add about 25% feather and then simply place the cursor over the blemish. Lightroom will estimate what area should be used to cover the blemish but if this is not good, you can relocate the selection area to improve the coverage. At the bottom of the Lightroom window there is a useful Visualise Spots box, this reveals a negative version of the image showing where potential blemishes are.
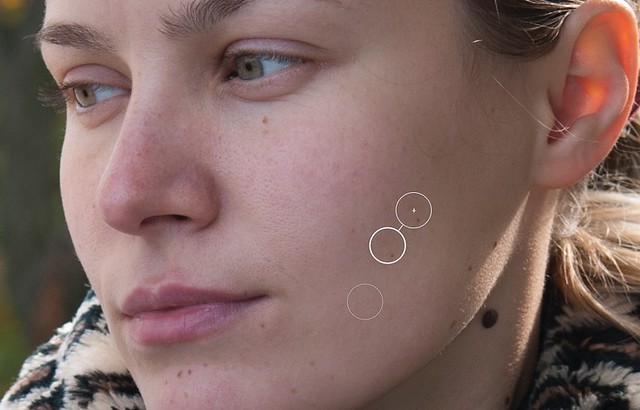
Use the heal selection of the Spot Removal tool
2. Enhancing the Eyes
Lightroom’s Adjustment Brush tool contains a number of useful presets to enhance portraits. To enhance the eyes we can use the Iris Enhance preset, from the presets drop-down. Zoom in tight on eye area, then apply the brush over the iris area. By default the flow rate, the rate at which the effect is applied is set to 48. This means that you might need to paint over the area several times for the effect to really kick in. Once the effect is applied, you can further enhance it by adjusting the sliders for the tool. Clarity and Saturation are particularly good tools to use.
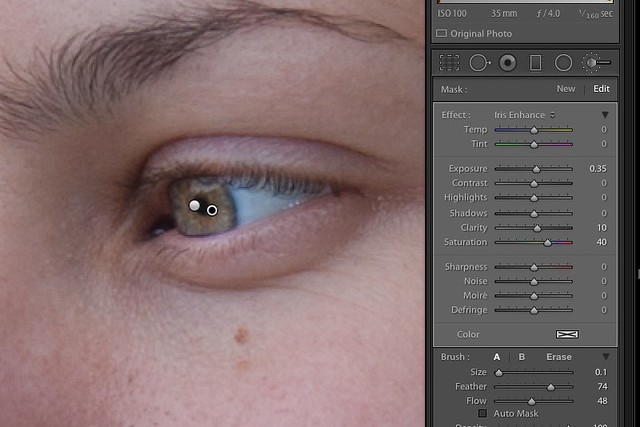
The Iris Enhance preset on the Adjustment Brush
3. Removing Wrinkles
Another Adjustment Brush preset comes in useful here, the soften skin preset. Like the Iris Enhance you simply carefully apply the brush over the wrinkles. Again like Iris Enhance, the preset is fully adjustable after the fact. You will find that the default brush size is very small, so that you can work on individual wrinkles. Another way to remove wrinkles is to return to the Spot Edit tool and use the Heal tab again. Select a small brush size and rather than selecting just a spot, click and drag along the wrinkle line. Lightroom will attempt to smooth out that line.
4. Blurring the Background
Not all of us are lucky enough to own fast prime lenses for that shallow depth of field, so in order to simulate the classic out of focus portrait background we can use Lightroom’s clarity slider with the Adjustment Brush tool. Select the tool and set the brush to a fairly large size and a feather of 10-20%. Now reduce the Clarity slider to -100 and paint around the model being careful not to cut into the model herself.
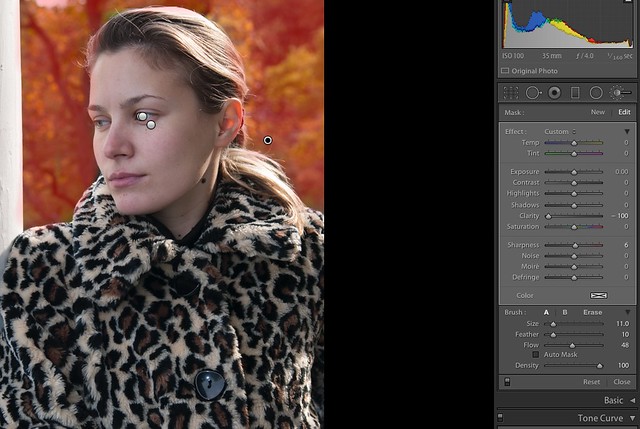
Painting an Adjustment mask to blur the background
5. Cinematic Style Portrait
The desaturated movie look is a great way to add character to your portraits. To achieve this we need to boost the contrast slider to between +5 to +10. We now boost the overall dynamic range by reducing highlights and whites by -10 to -20 and increasing shadows and blacks by the same. Play around with the exact figures to get a slightly flatter looking image.
Now we are going to slide the clarity tool to around +40-50%. Next we slide the Saturation tool to -50 to -60 to remove a lot of the colour from the image, you can also experiment using the Vibrance tool instead.
Now using the Tone Curve we can boost the contrast slightly. At the left and right ends of the histogram drag the line down slightly. In the mid tone region you can, if needed, bring the line upwards. This adds a subtle boost in the overall contrast.
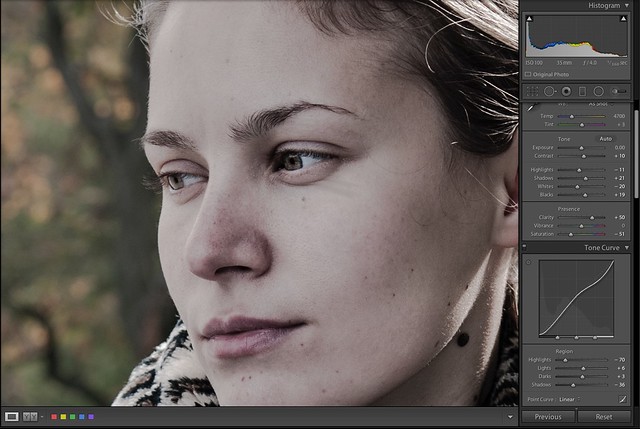
The cinematic film look
6. Sharpening Eyes
The most important part of any portrait is the eyes. As well as enhancing them, it is a good idea to selectively sharpen them. Rather than apply a blanket sharpen to the whole image, which may reintroduce some of issues we have already removed, we can sharpen only the eye area. To do this, we return to our old favorite, the Adjustment Brush. Reset any corrections in the tool by clicking twice on the Effect text at the top of the tool. From the bottom of the Lightroom window, check the Show Selected Mask Overlay box and gently paint over the eyes. You will see a red mask being overlaid, helping you to to keep the correction only on the eyes. Use a brush that is about 50% the size of the eyes and a feather of about 10%. Once happy, select the Show Overlay box and boost the Clarity by 20% and the Sharpness to 70-80%.

Use selective sharpening for the eyes
While these are quite basic techniques, using one, some or all of them can make dramatic improvements to the look of your portraits.
The post Create Perfect Portraits in Lightroom Using These 6 Classic Retouch Techniques appeared first on Light Stalking.